This may not be a great new thing for some, but for me it was a wonderful thing to learn. I was making myself a new mala and wanted to add a tassel. Tassels are easy to find in stores, but when you have a picture in your head of what you want, sometimes it’s really difficult to find just what your mind’s eye is showing you. So what’s the answer? Learn to make a tassel yourself.
For my new mala I was using 108 6mm faceted Amazonite beads. Accenting with green Agate and Jade barrels and daisy spacers. Instead of a Guru bead I chose to use an Avalokitsvara charm – this is why it isn’t exactly an accurate mala. But since I am using this as decoration, not for my meditation practice, this isn’t a big deal.
There was much fretting when picking the thread for this mala project. Picking thread can be SO confusing! Which kind of thread – silk, nylon, polyester? What thickness – 4, 6, D, F? So many options, which one is the right one? Each thread has its own merits and reasons to be chosen for a project. I needed a thread that was thin enough to go through a bead multiple times, and strong enough to hold the weight of the beads. I elected for nylon thread because it had the turquoise colour I was looking for, it was thin and should stand up to the jagged edges of the drill holes of the beads.
For this tutorial I will be using some of the plentiful embroidery floss that we talked about in the last post.
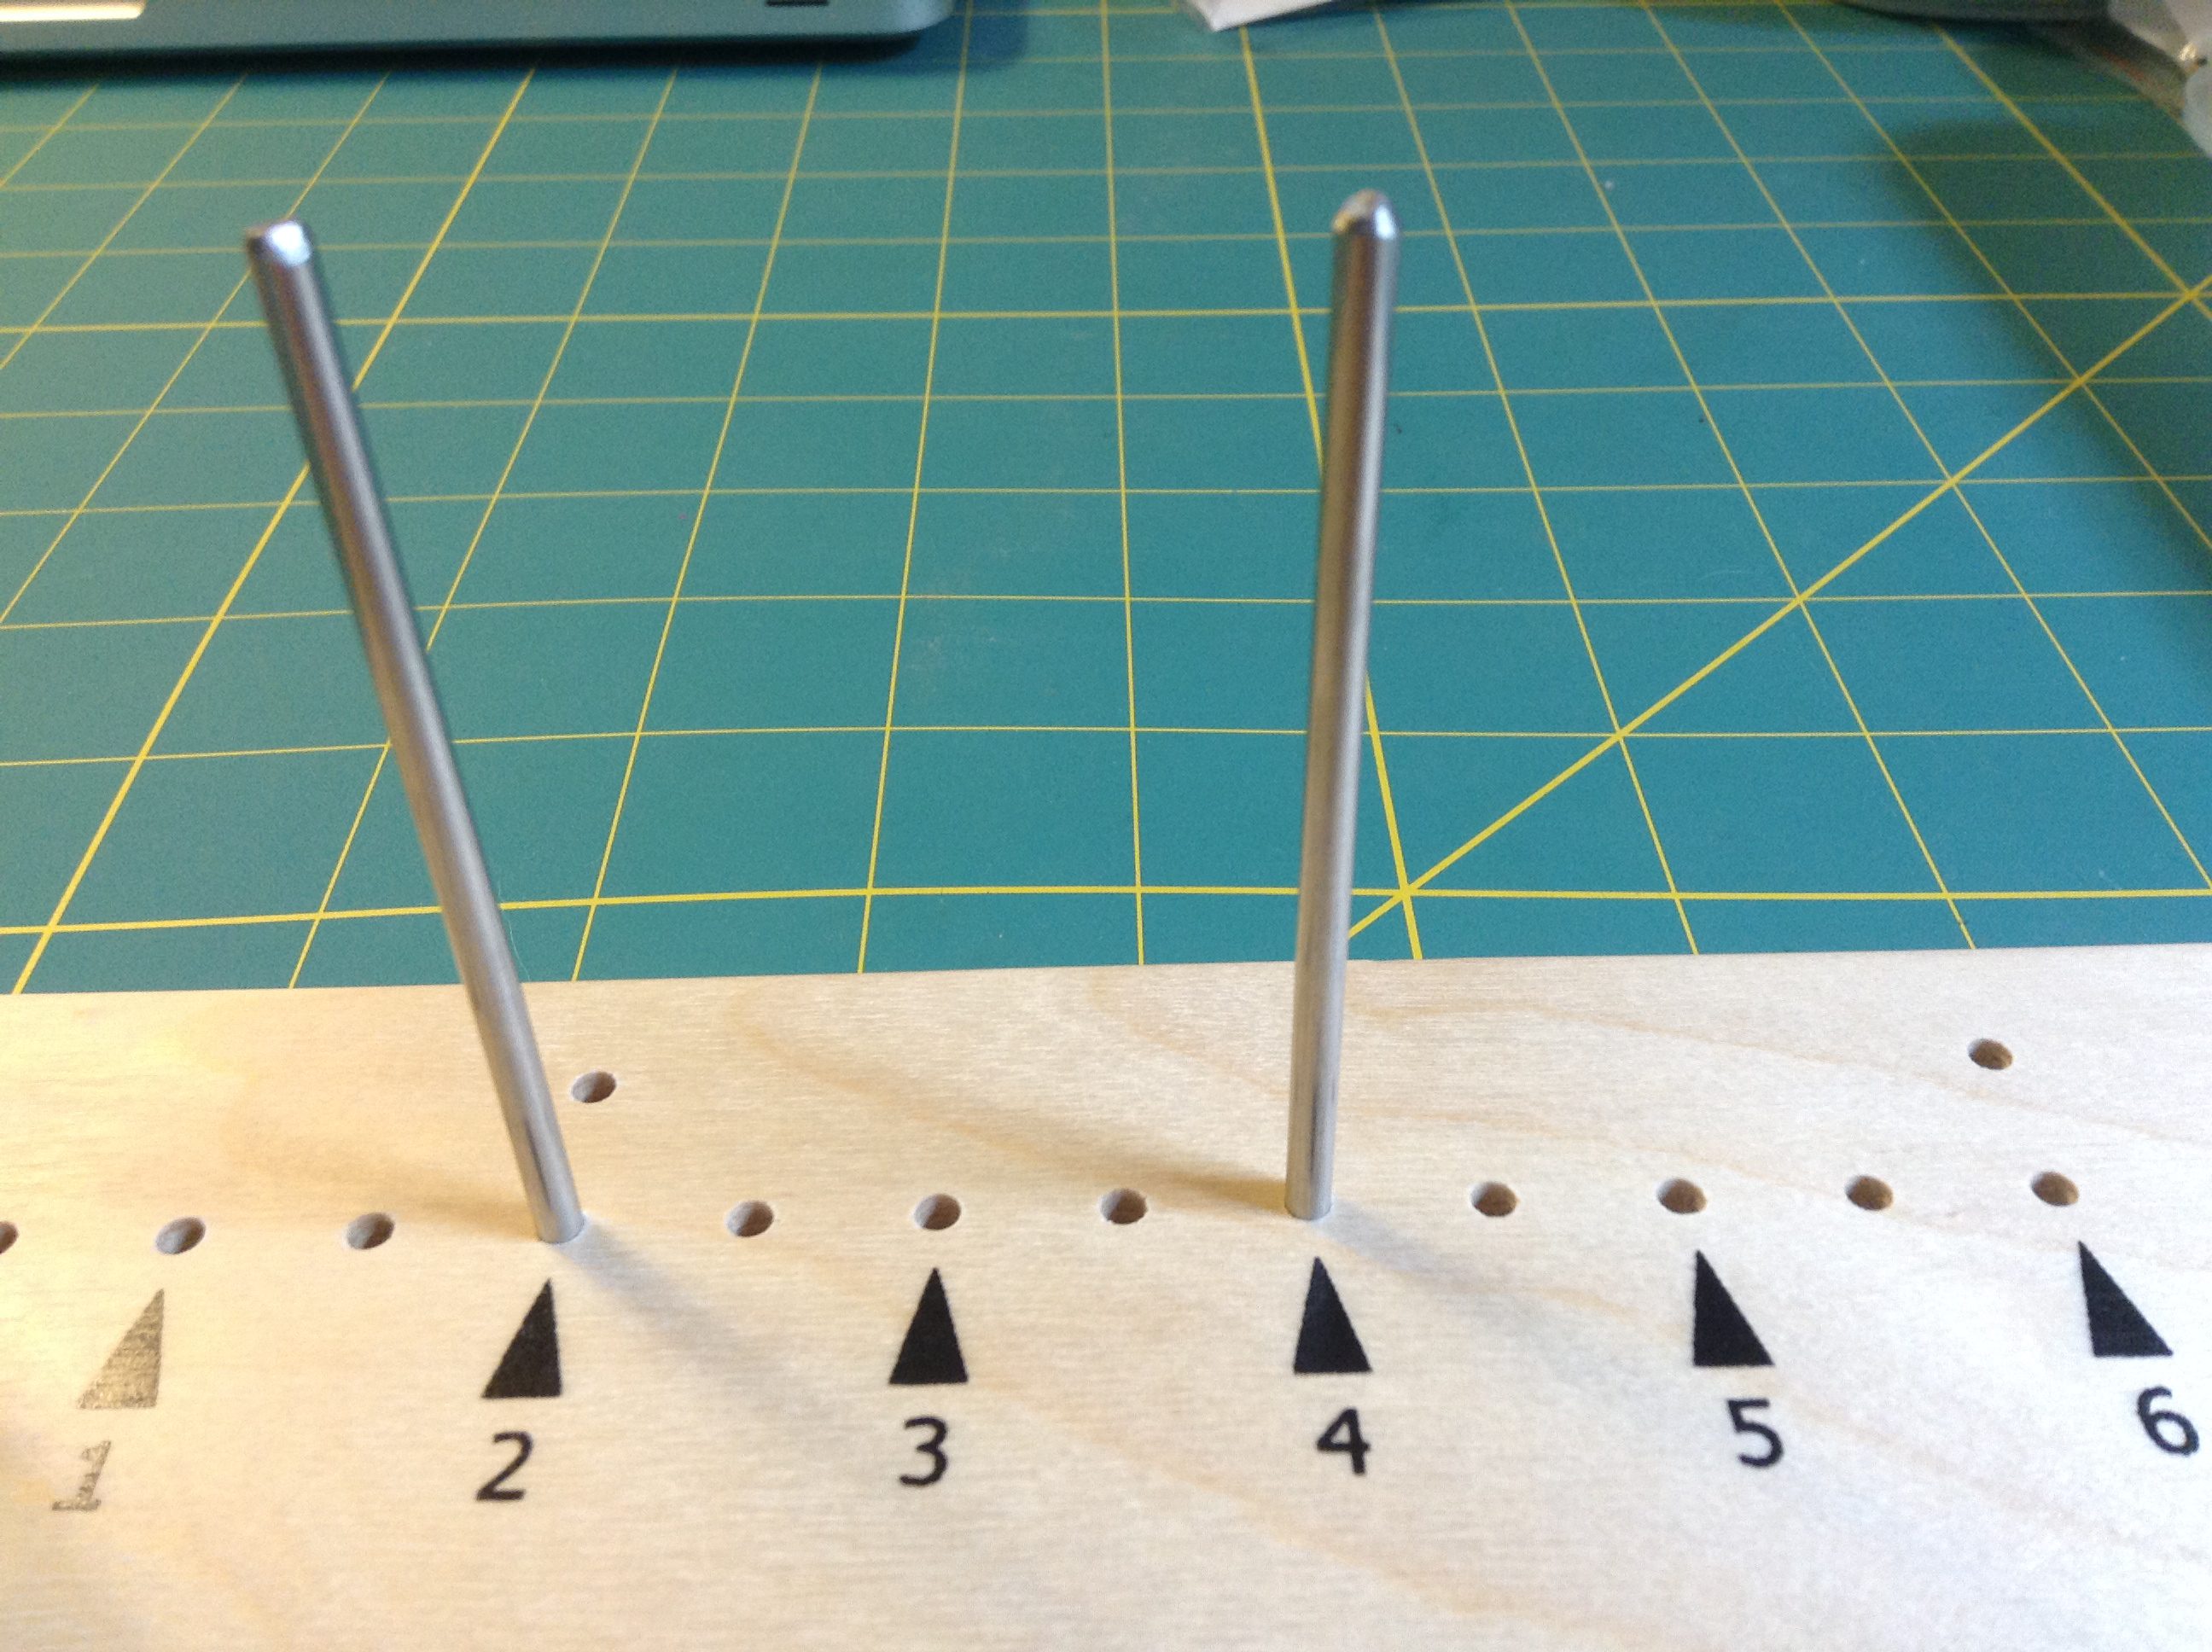
Determine the final length you wish your tassel to be. I wanted a two inch tassel for the mala. Using your thread, wrap it around two pegs (or a piece of sturdy cardboard) the length you want.
Wrap, wrap and wrap some more until you have created the thickness you want from your tassel. This part is subjective since you may want a thinner or fuller tassel.
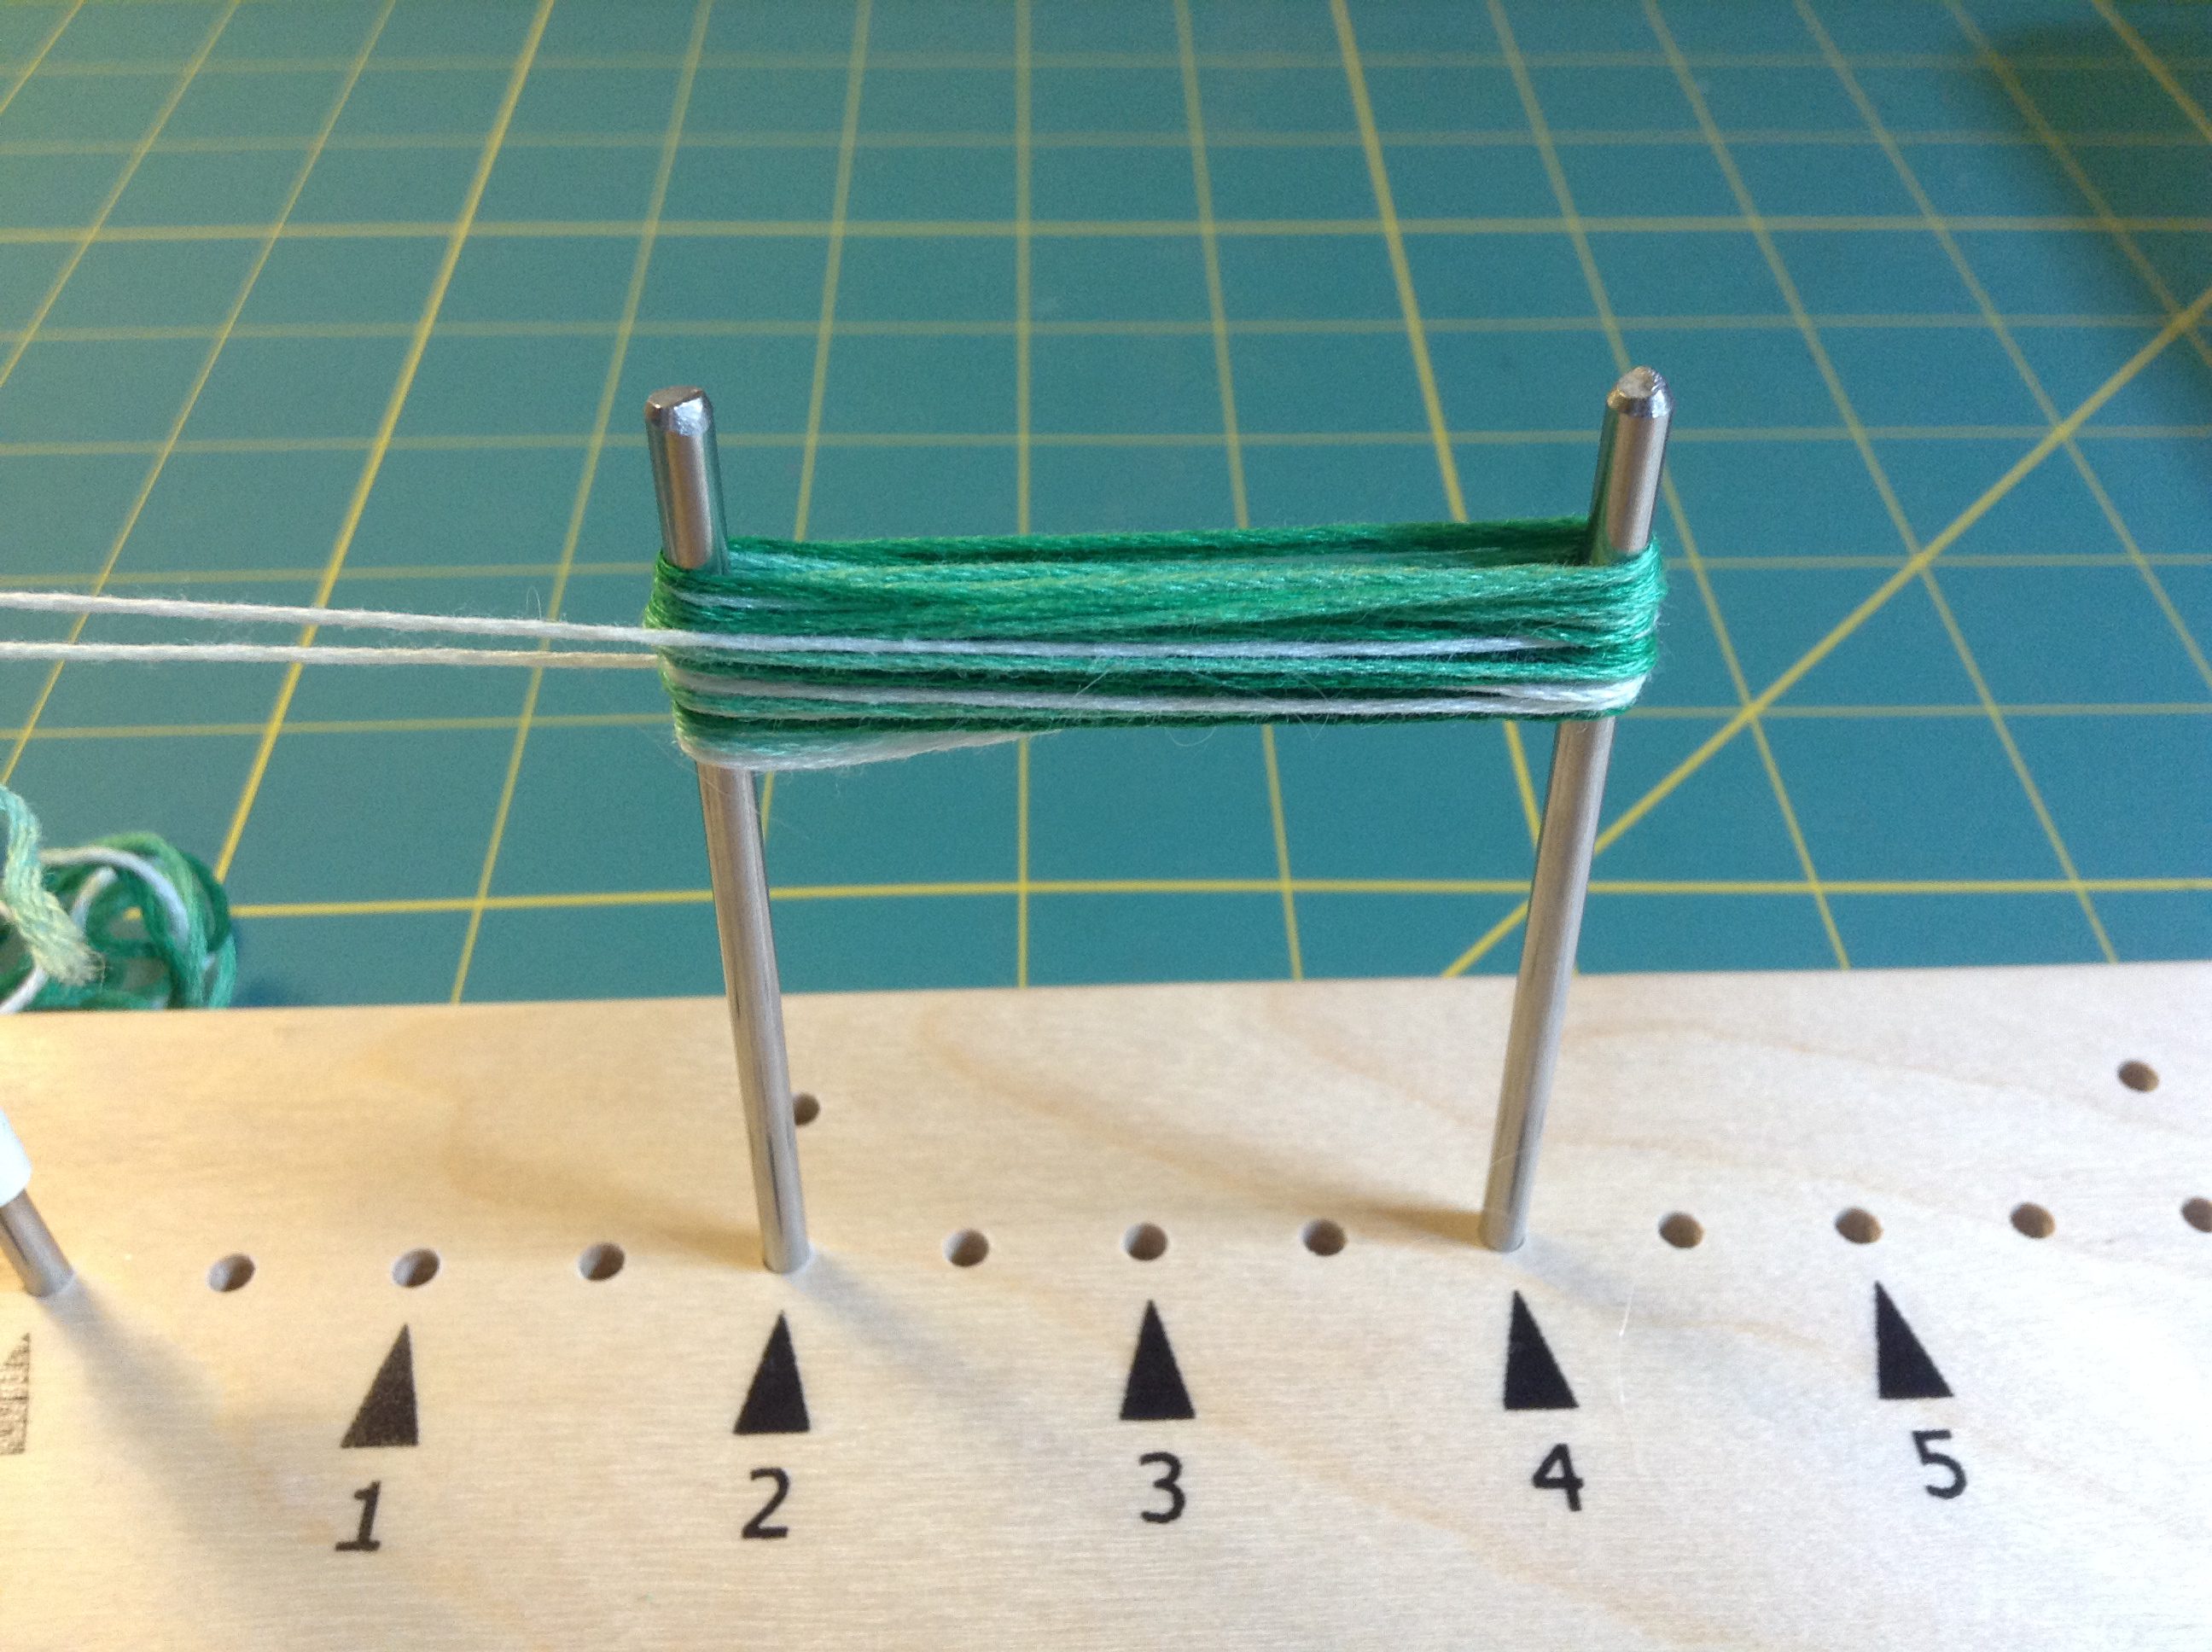
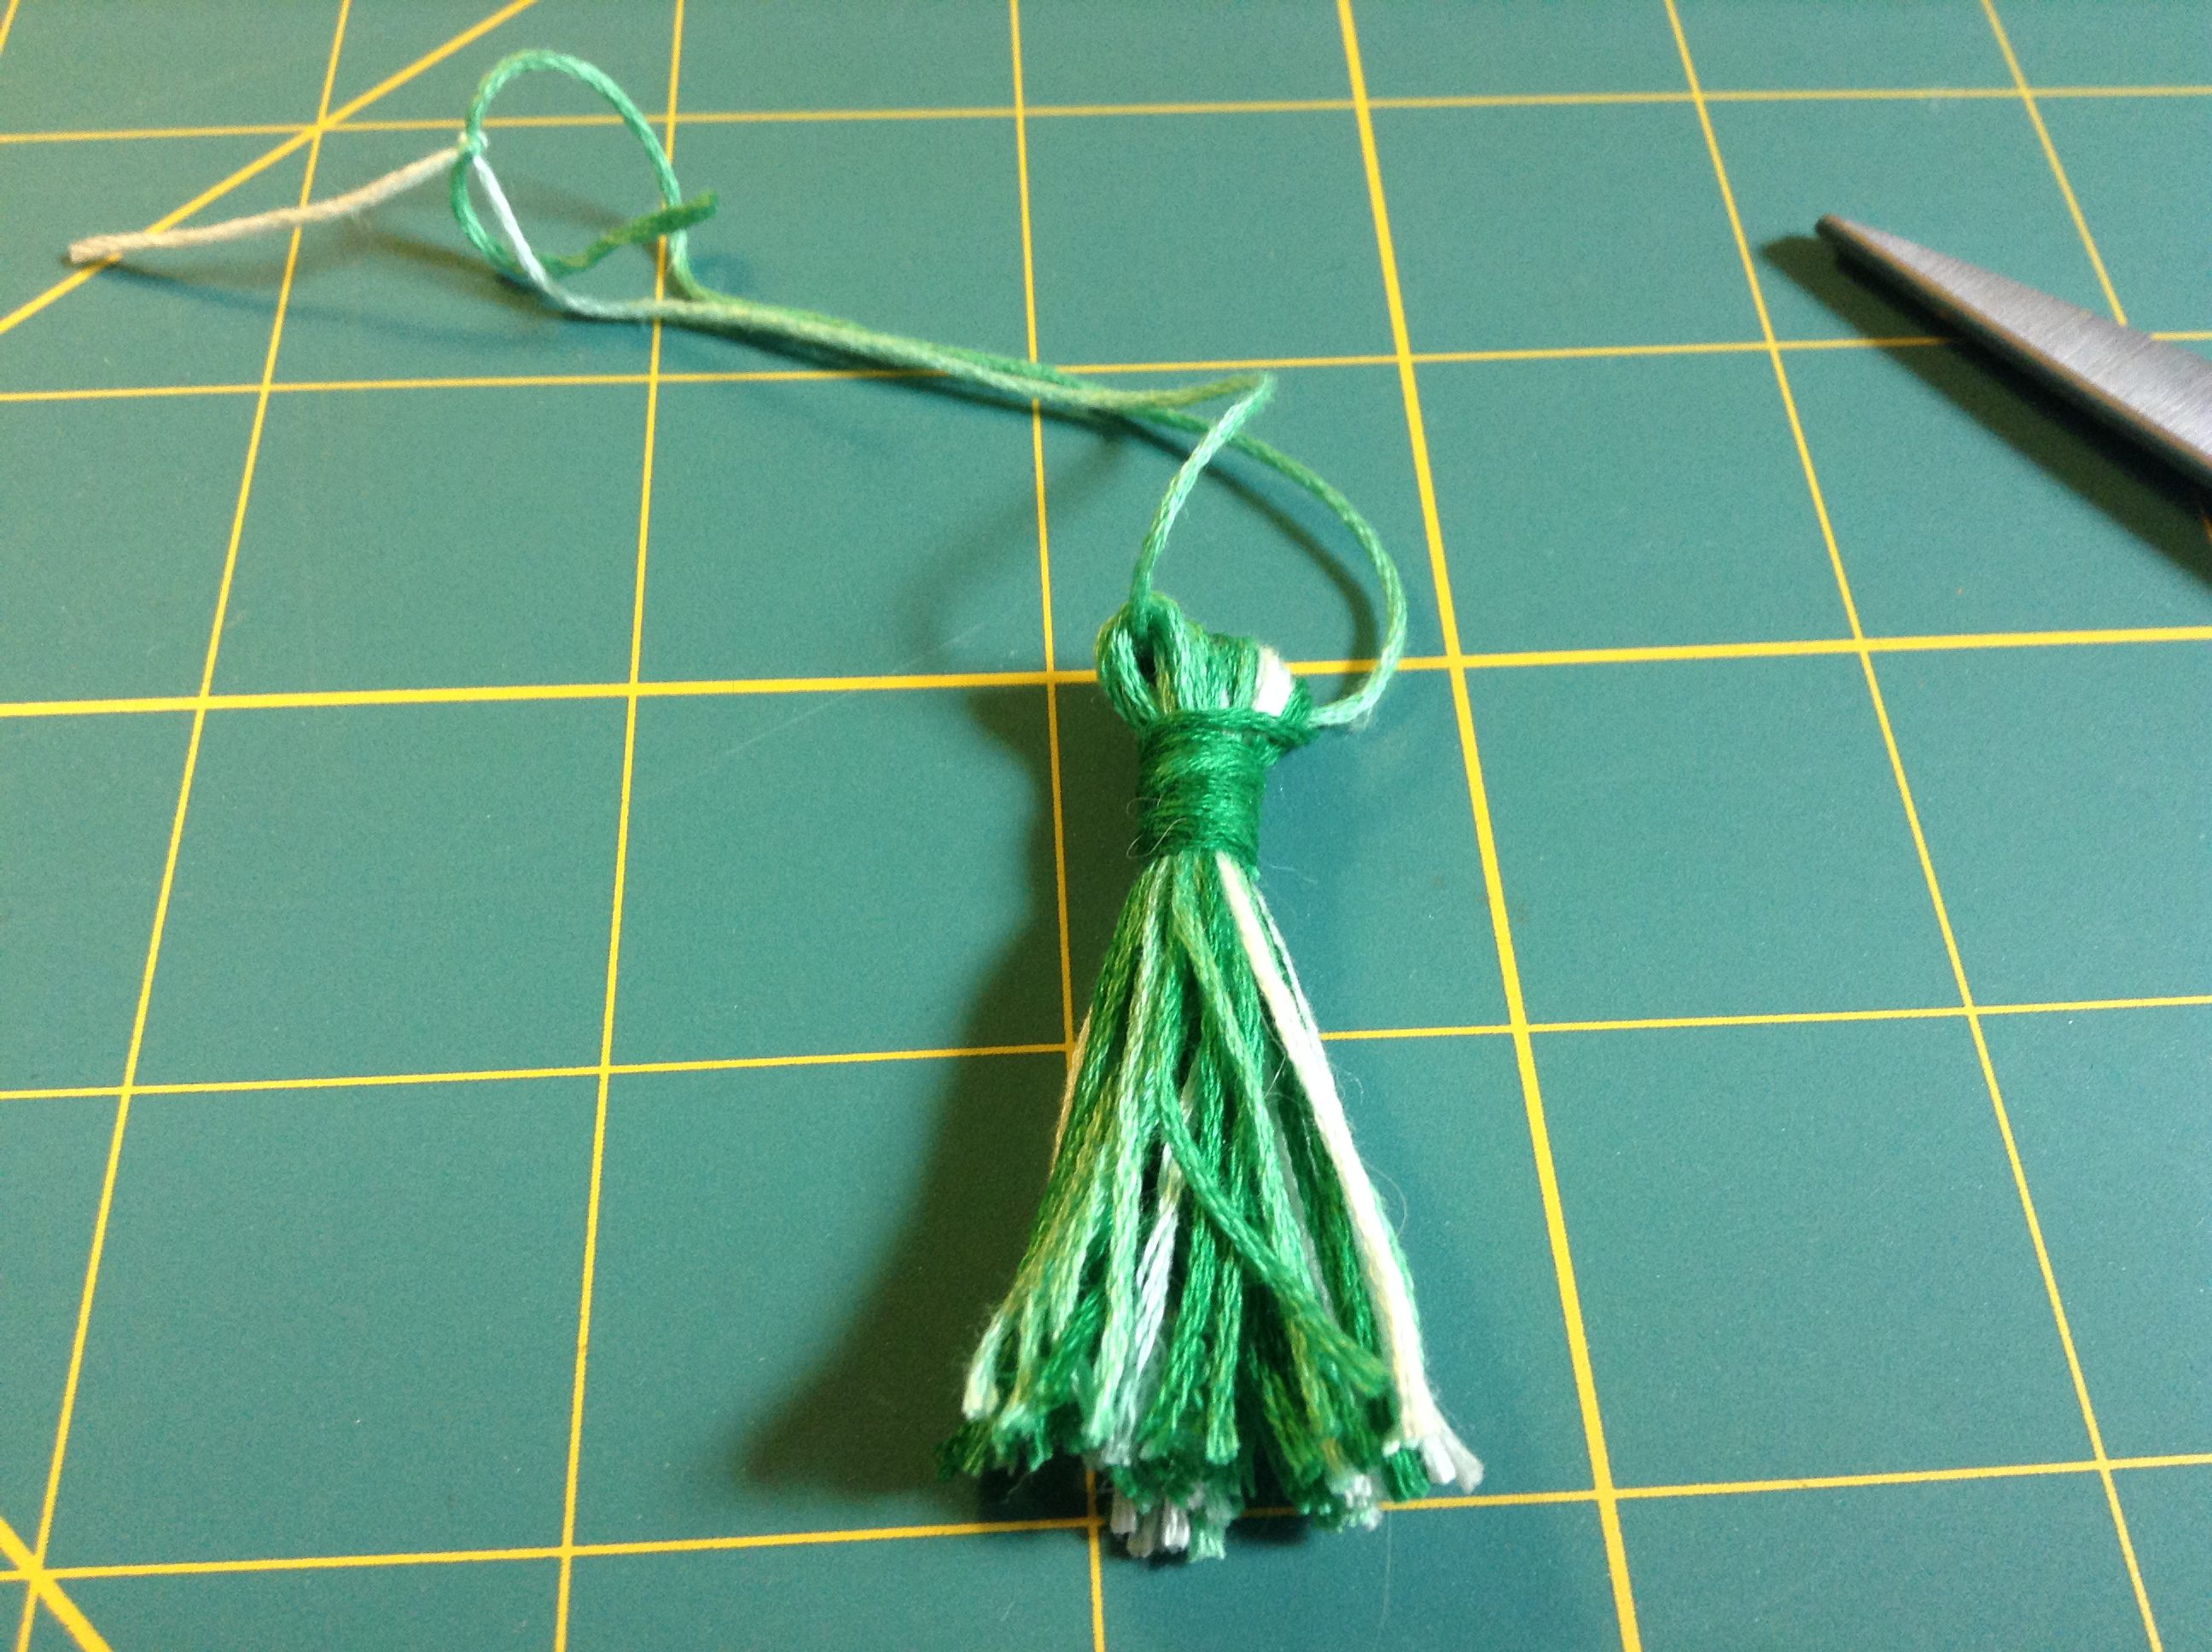
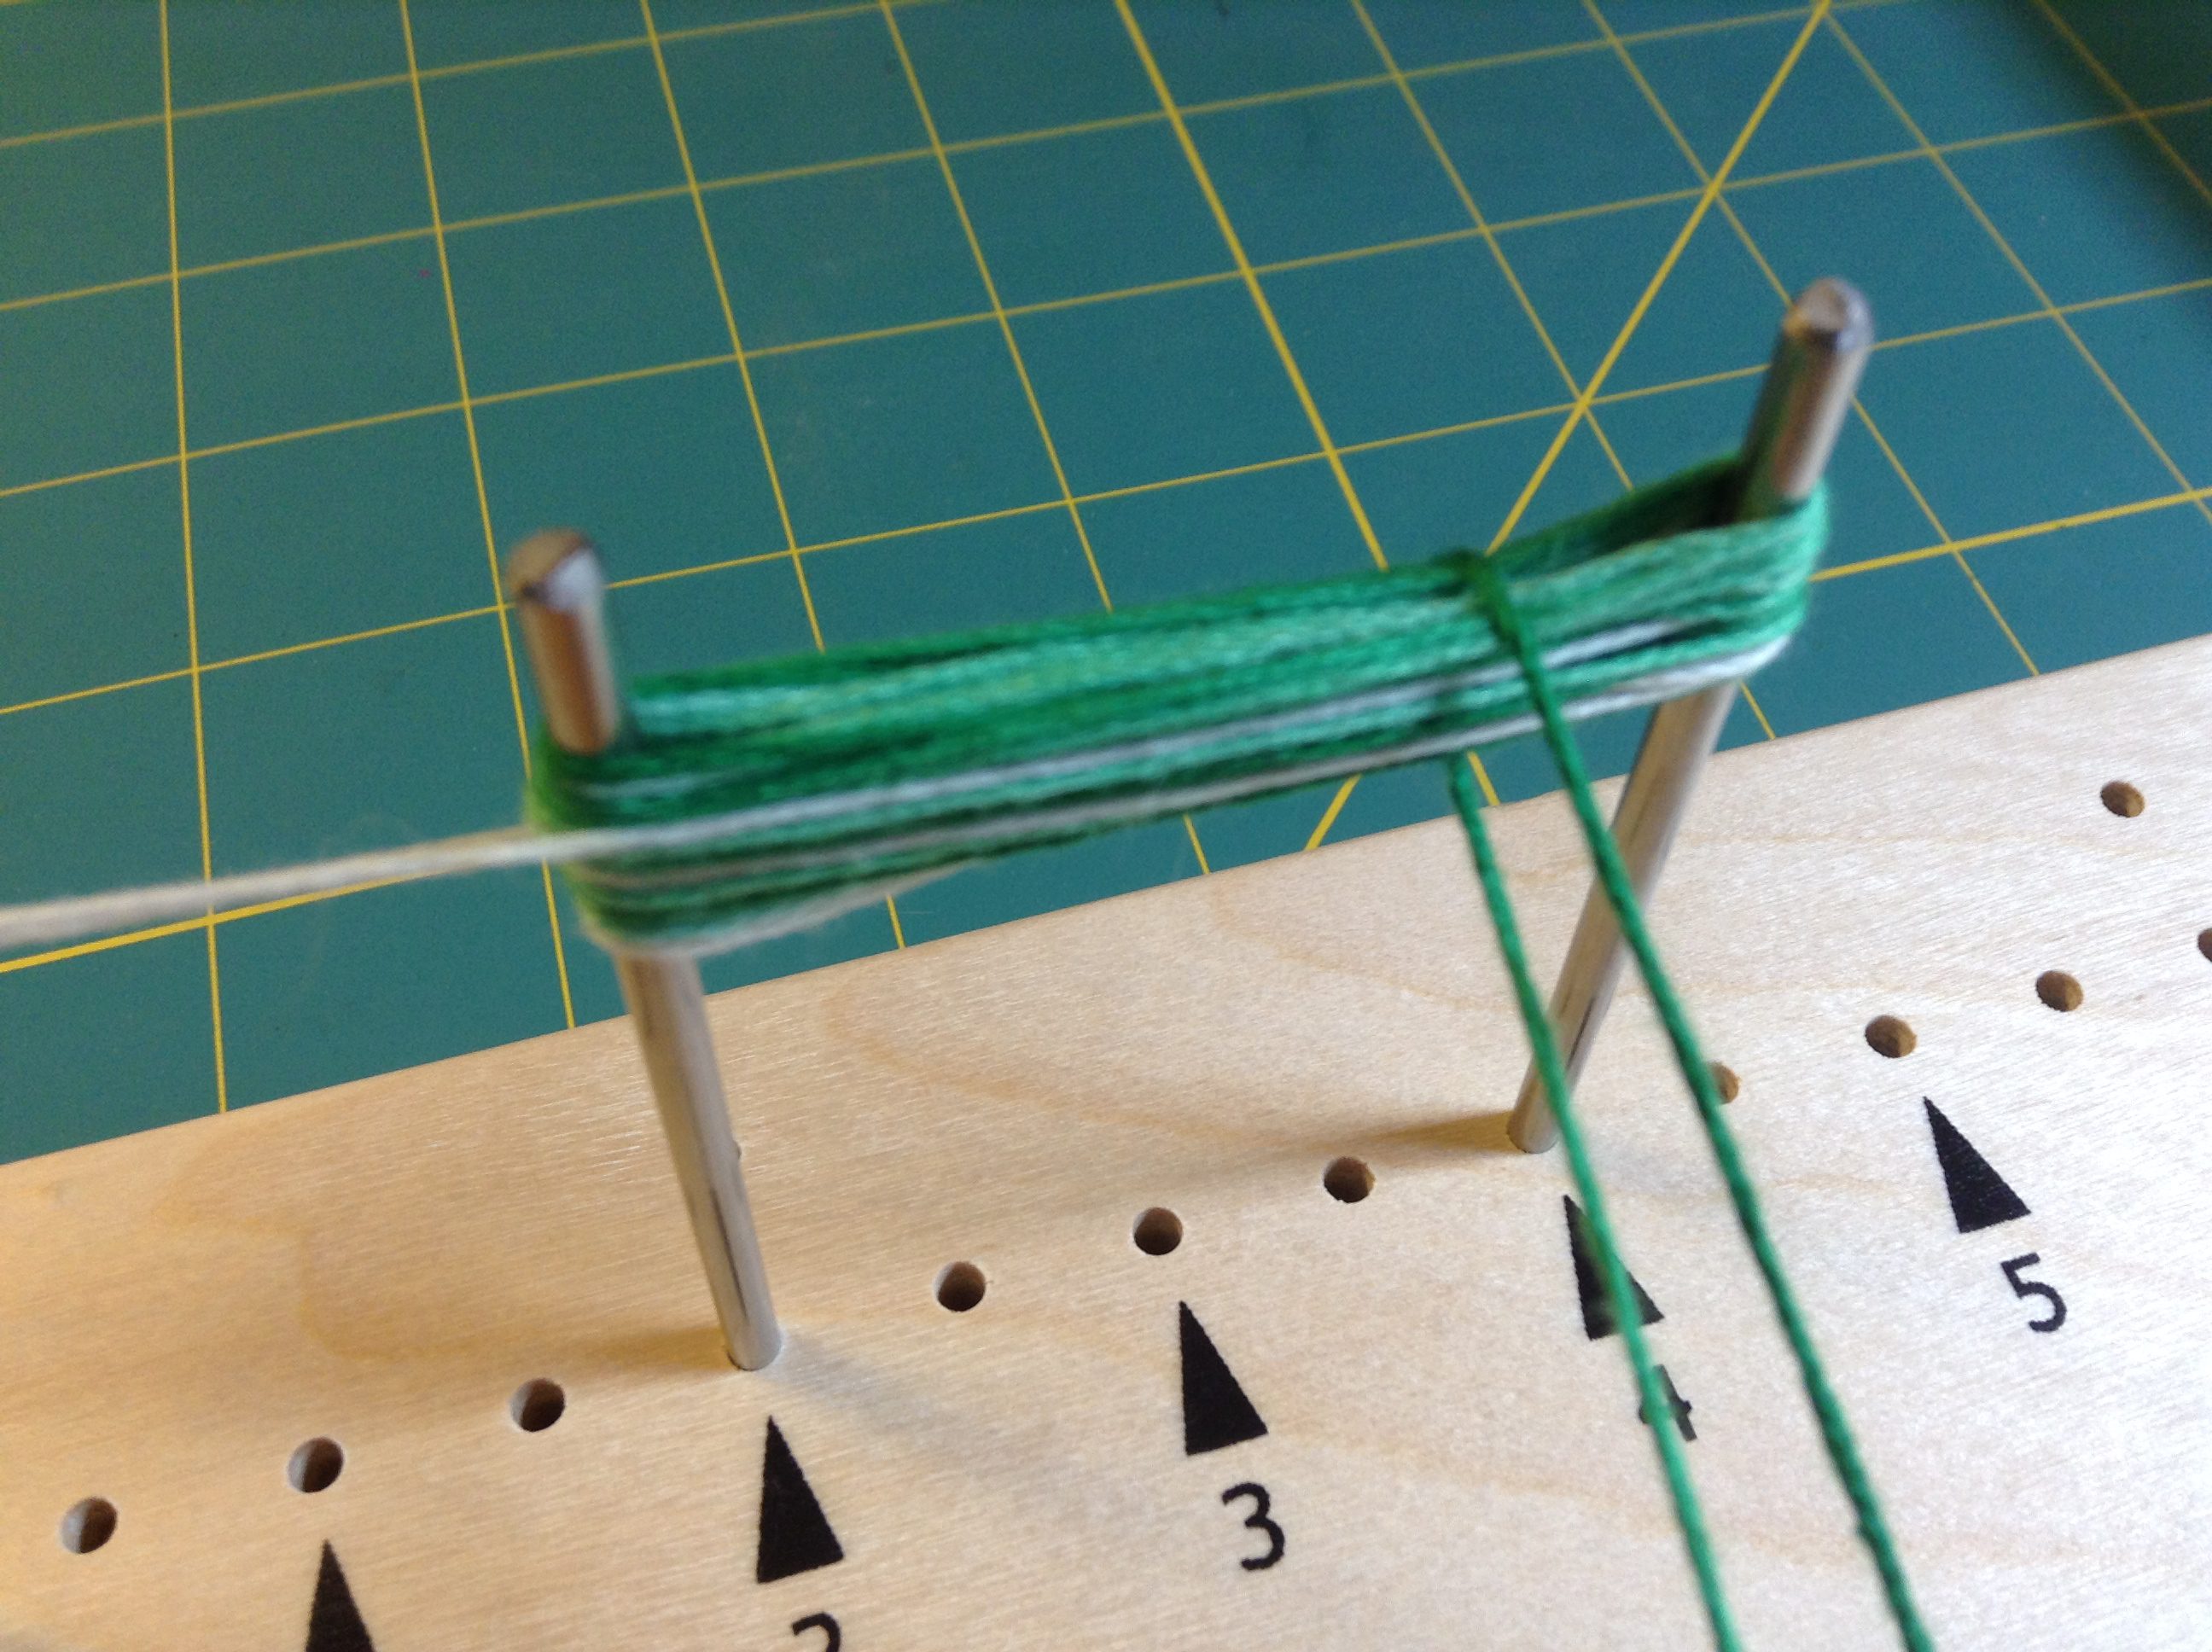
When you are happy with the thickness, cut your bundle from the orignal thread.
Using the thread, begin to wrap around the bundle to hold the pieces together and for creating a coil knot.
Again, when you are satisfied with the width of the wrapping, take one end of the string and pass it back through the center of your coil to where the other end of your string is. I used large eye needles to assist with passing the threads back through the coiling.
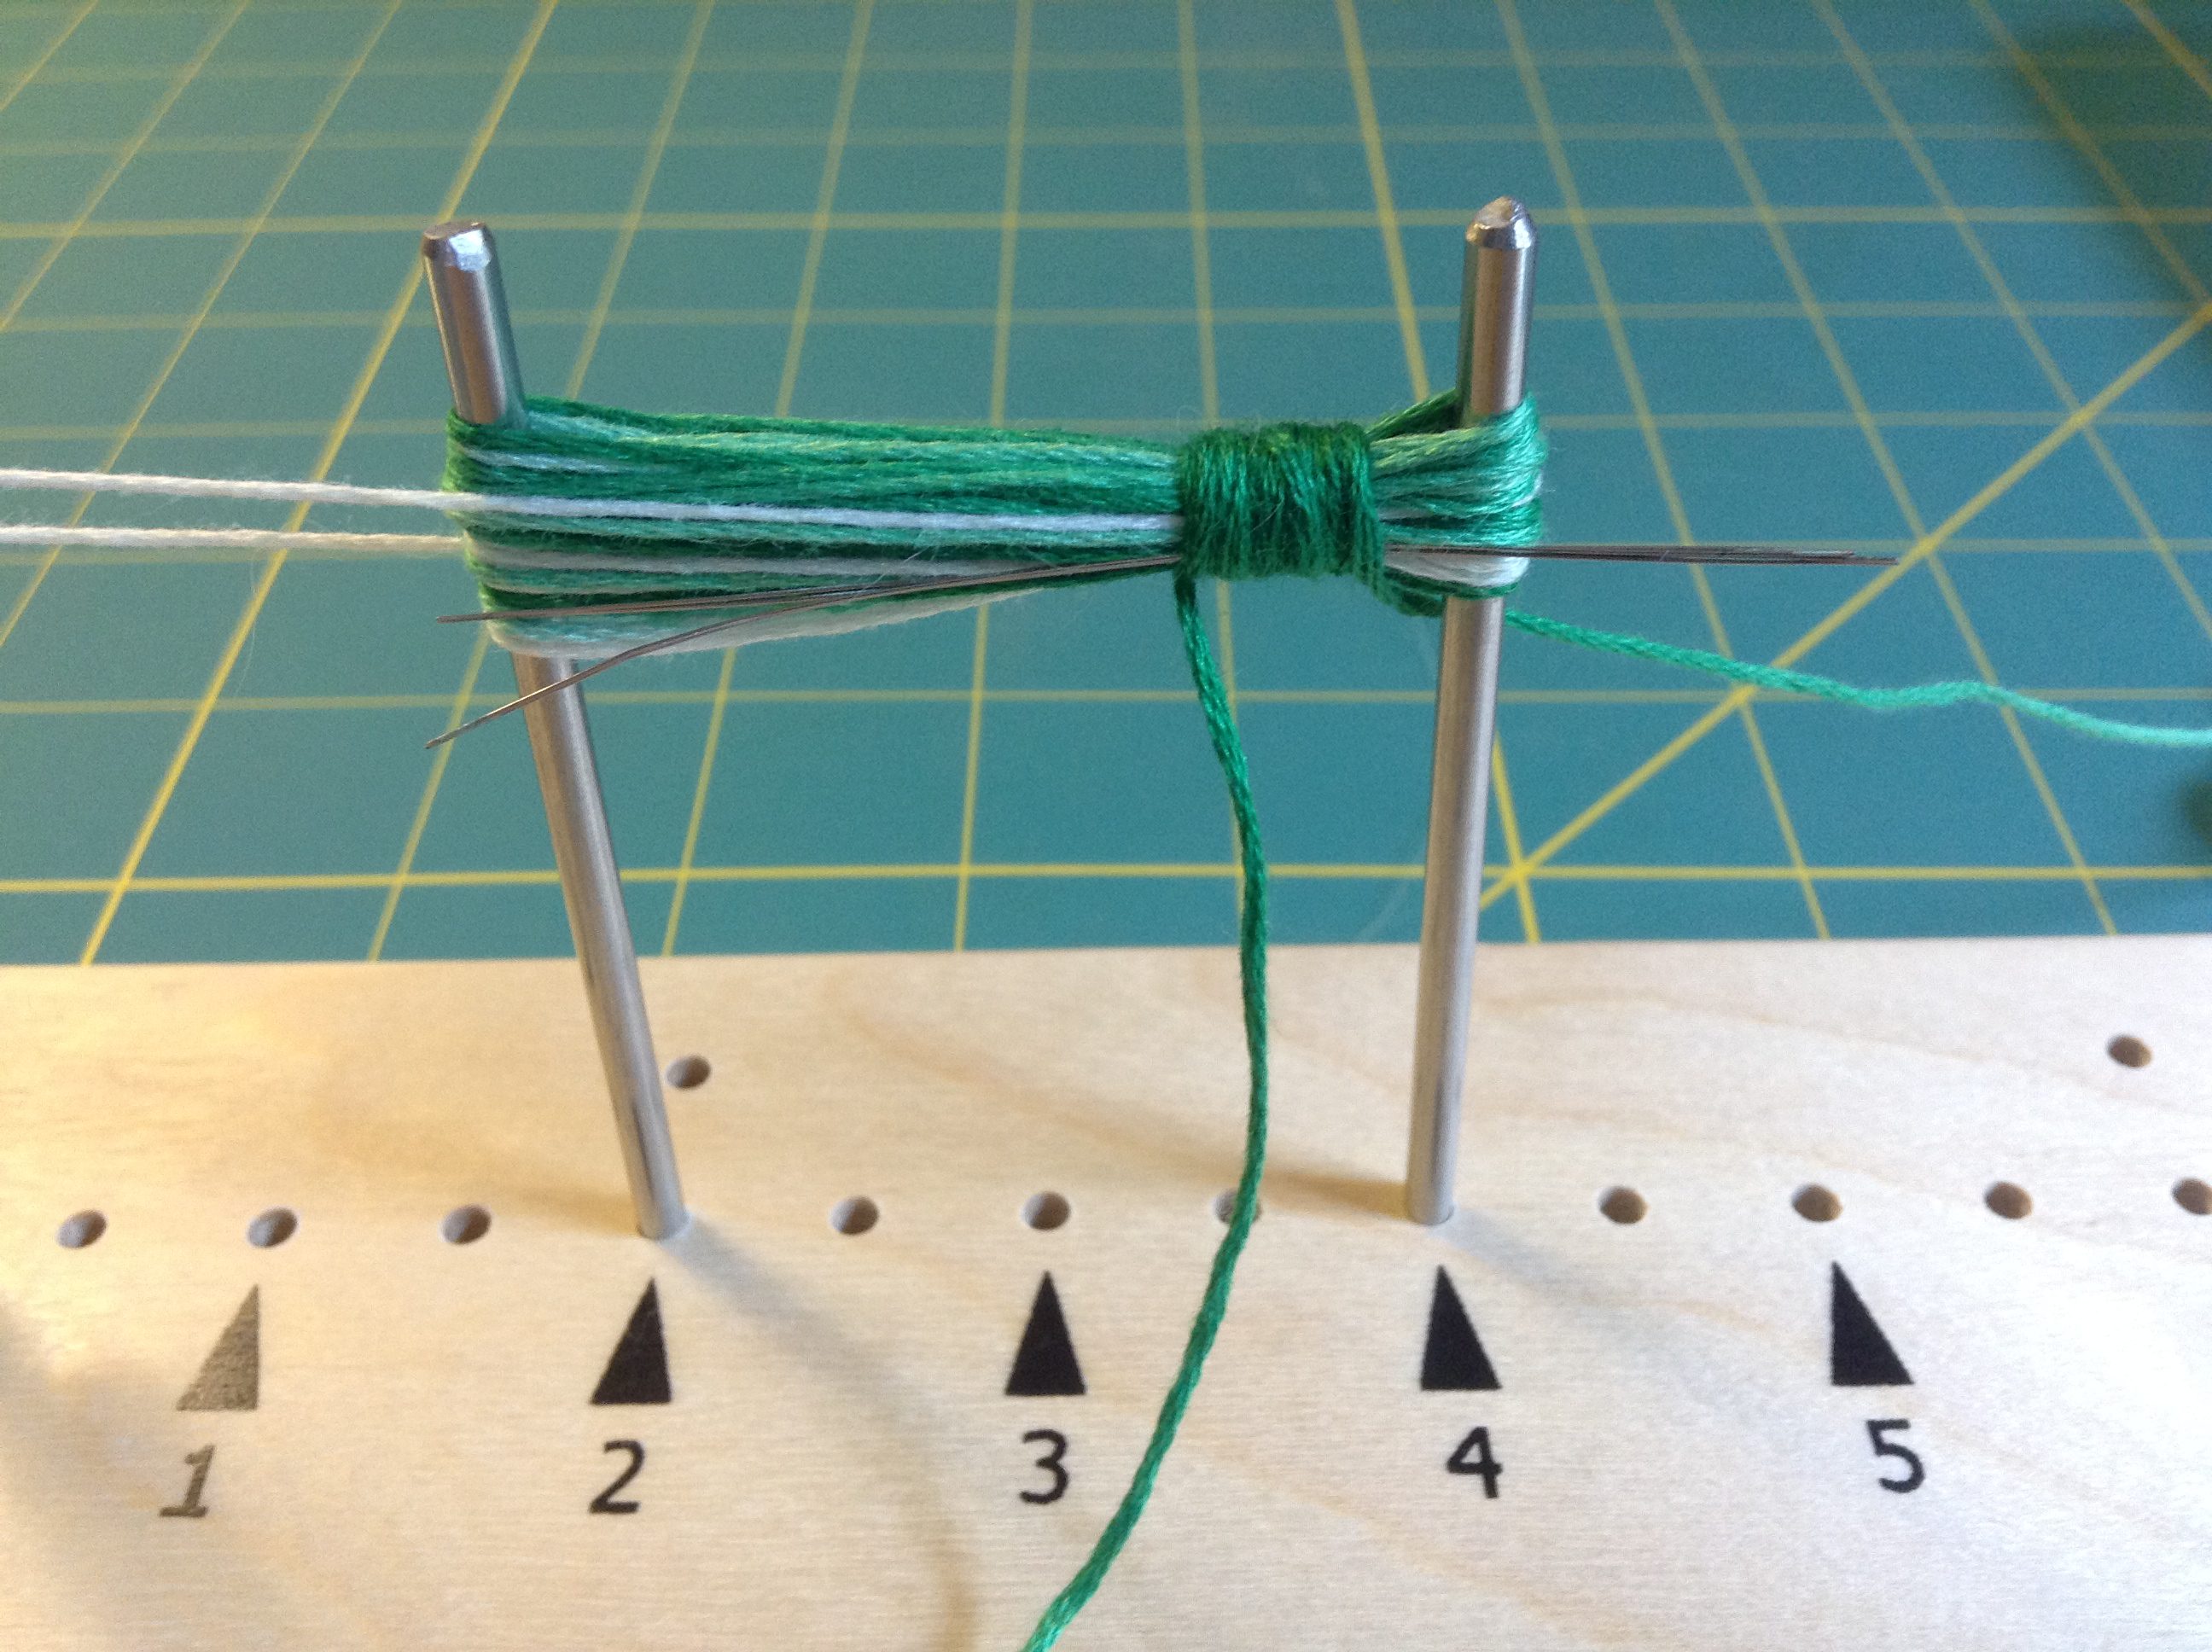
Now, take the other string and pass it up through the coil to finish your coil knot.
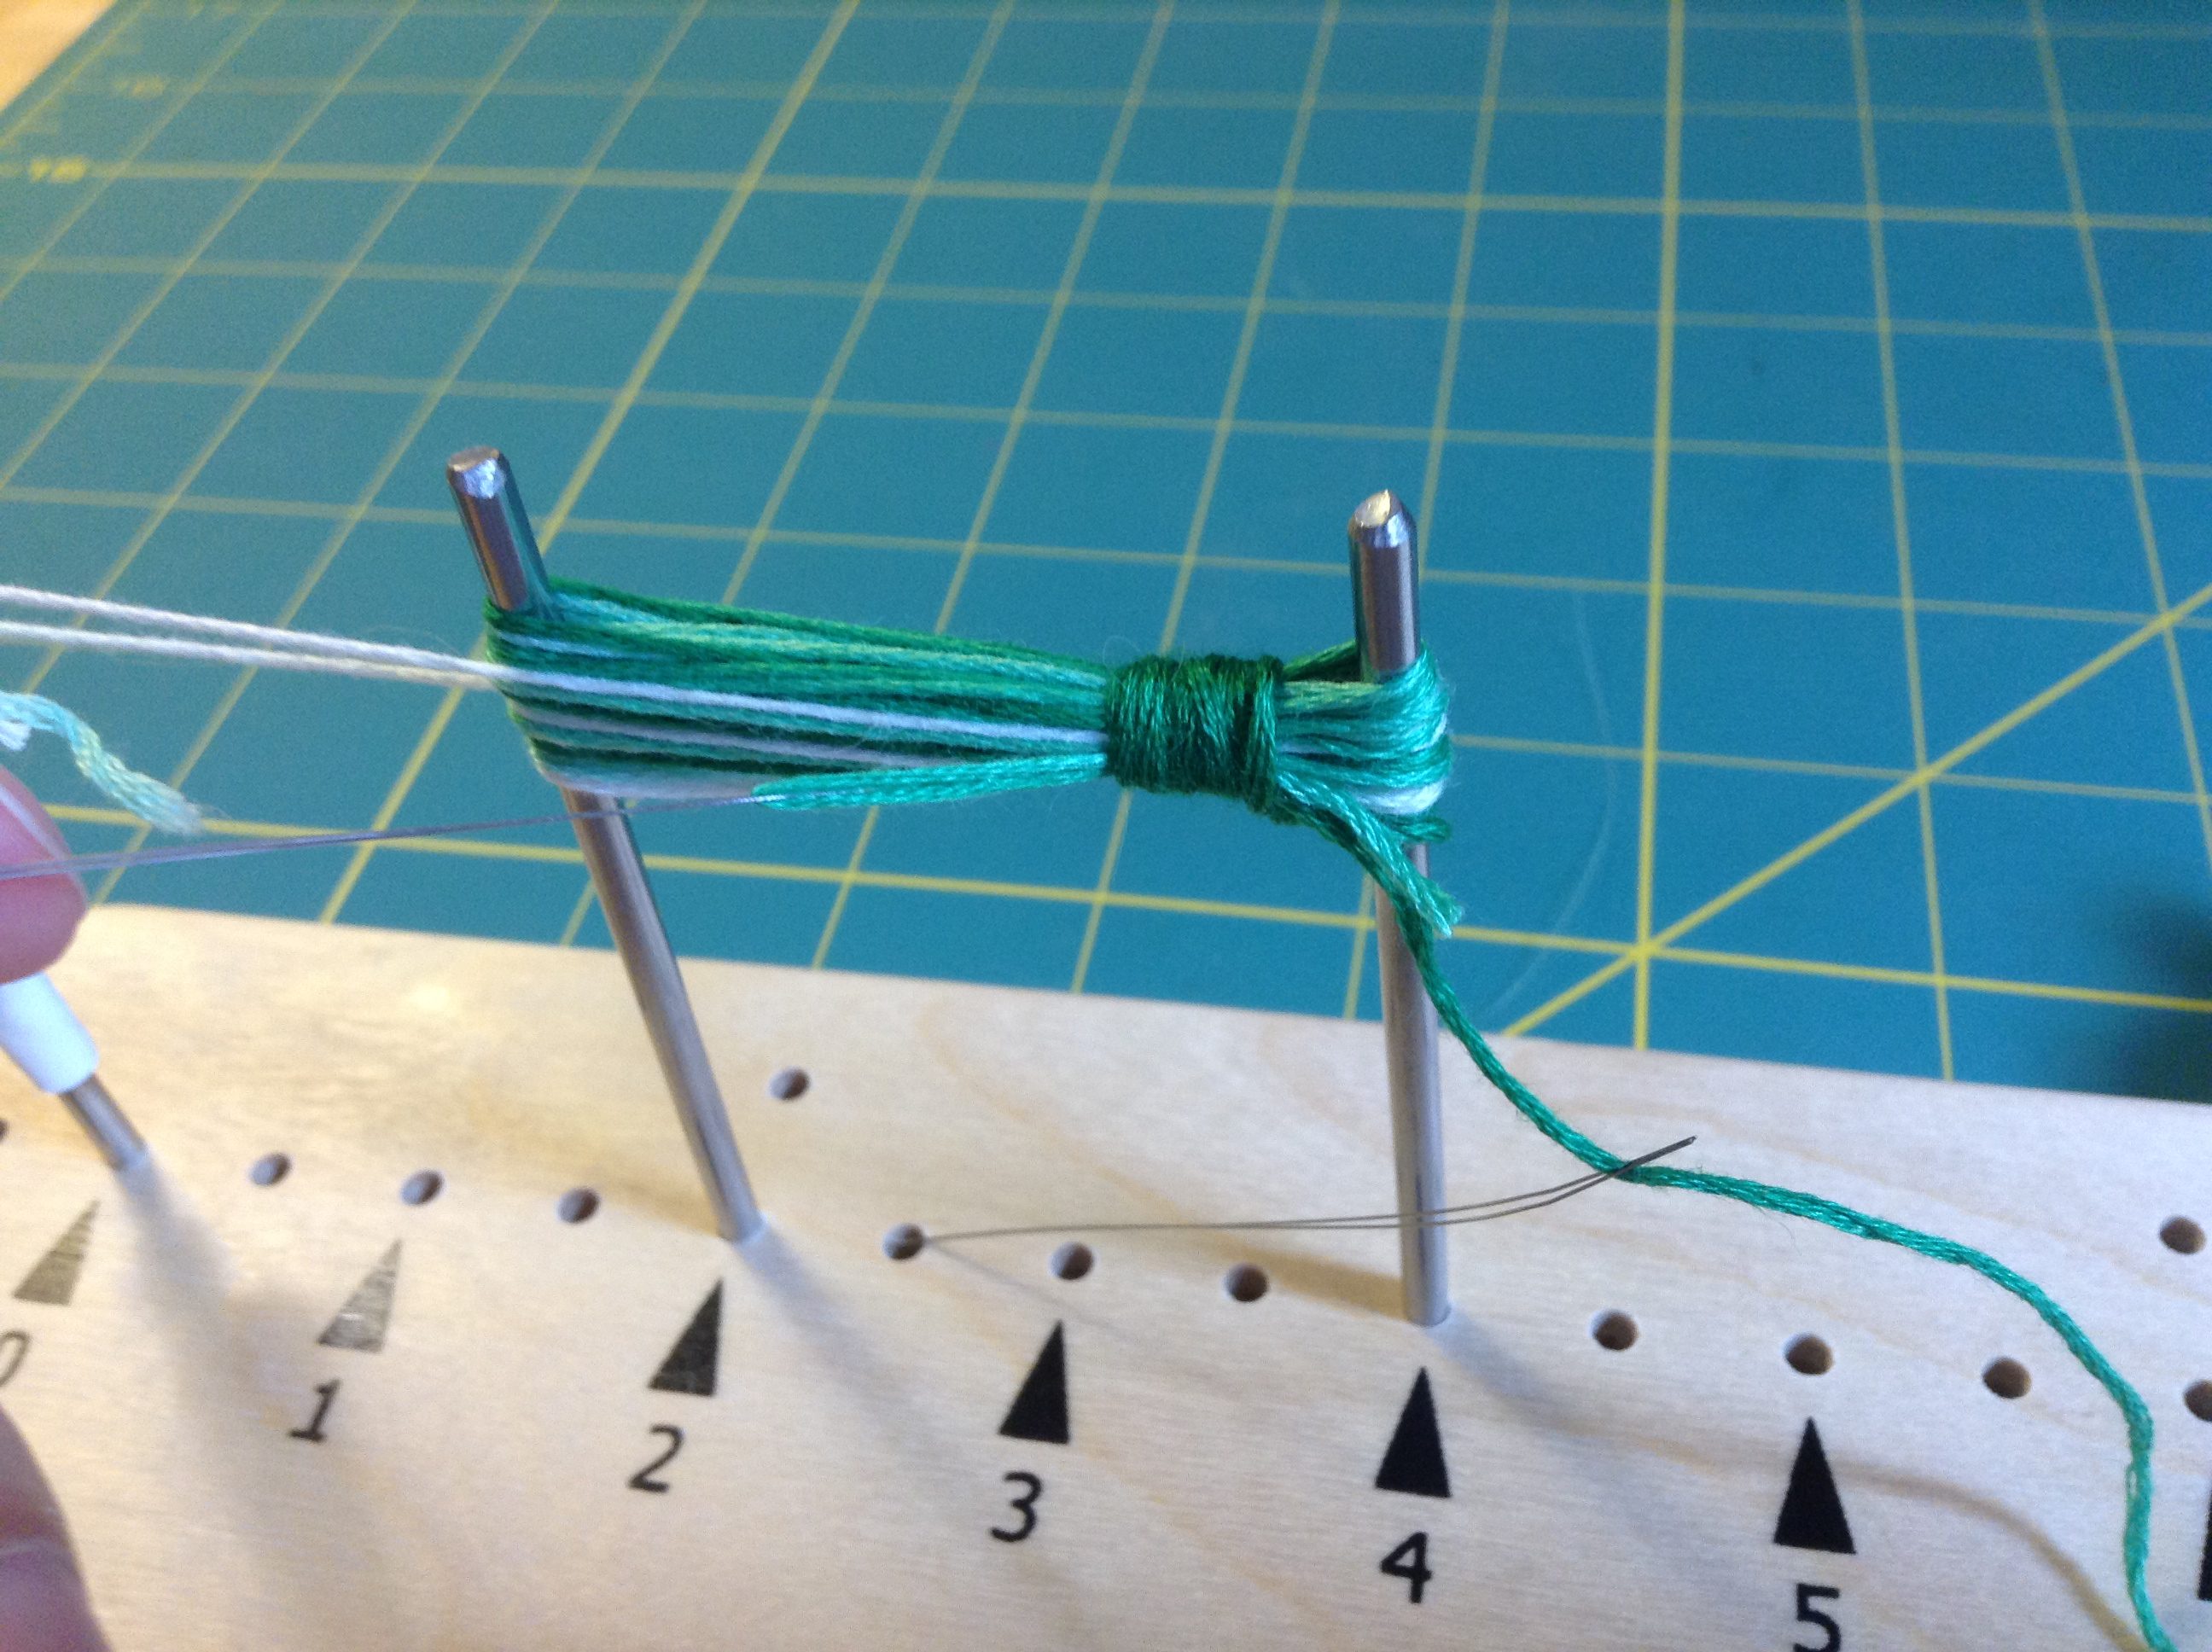
One thing to note about the coil knot is how to secure it so that it won’t come apart, and this will depend on the type of thread you used. You may need to use glue.
After your coil knot is complete you can take your thread bundle off the pegs.
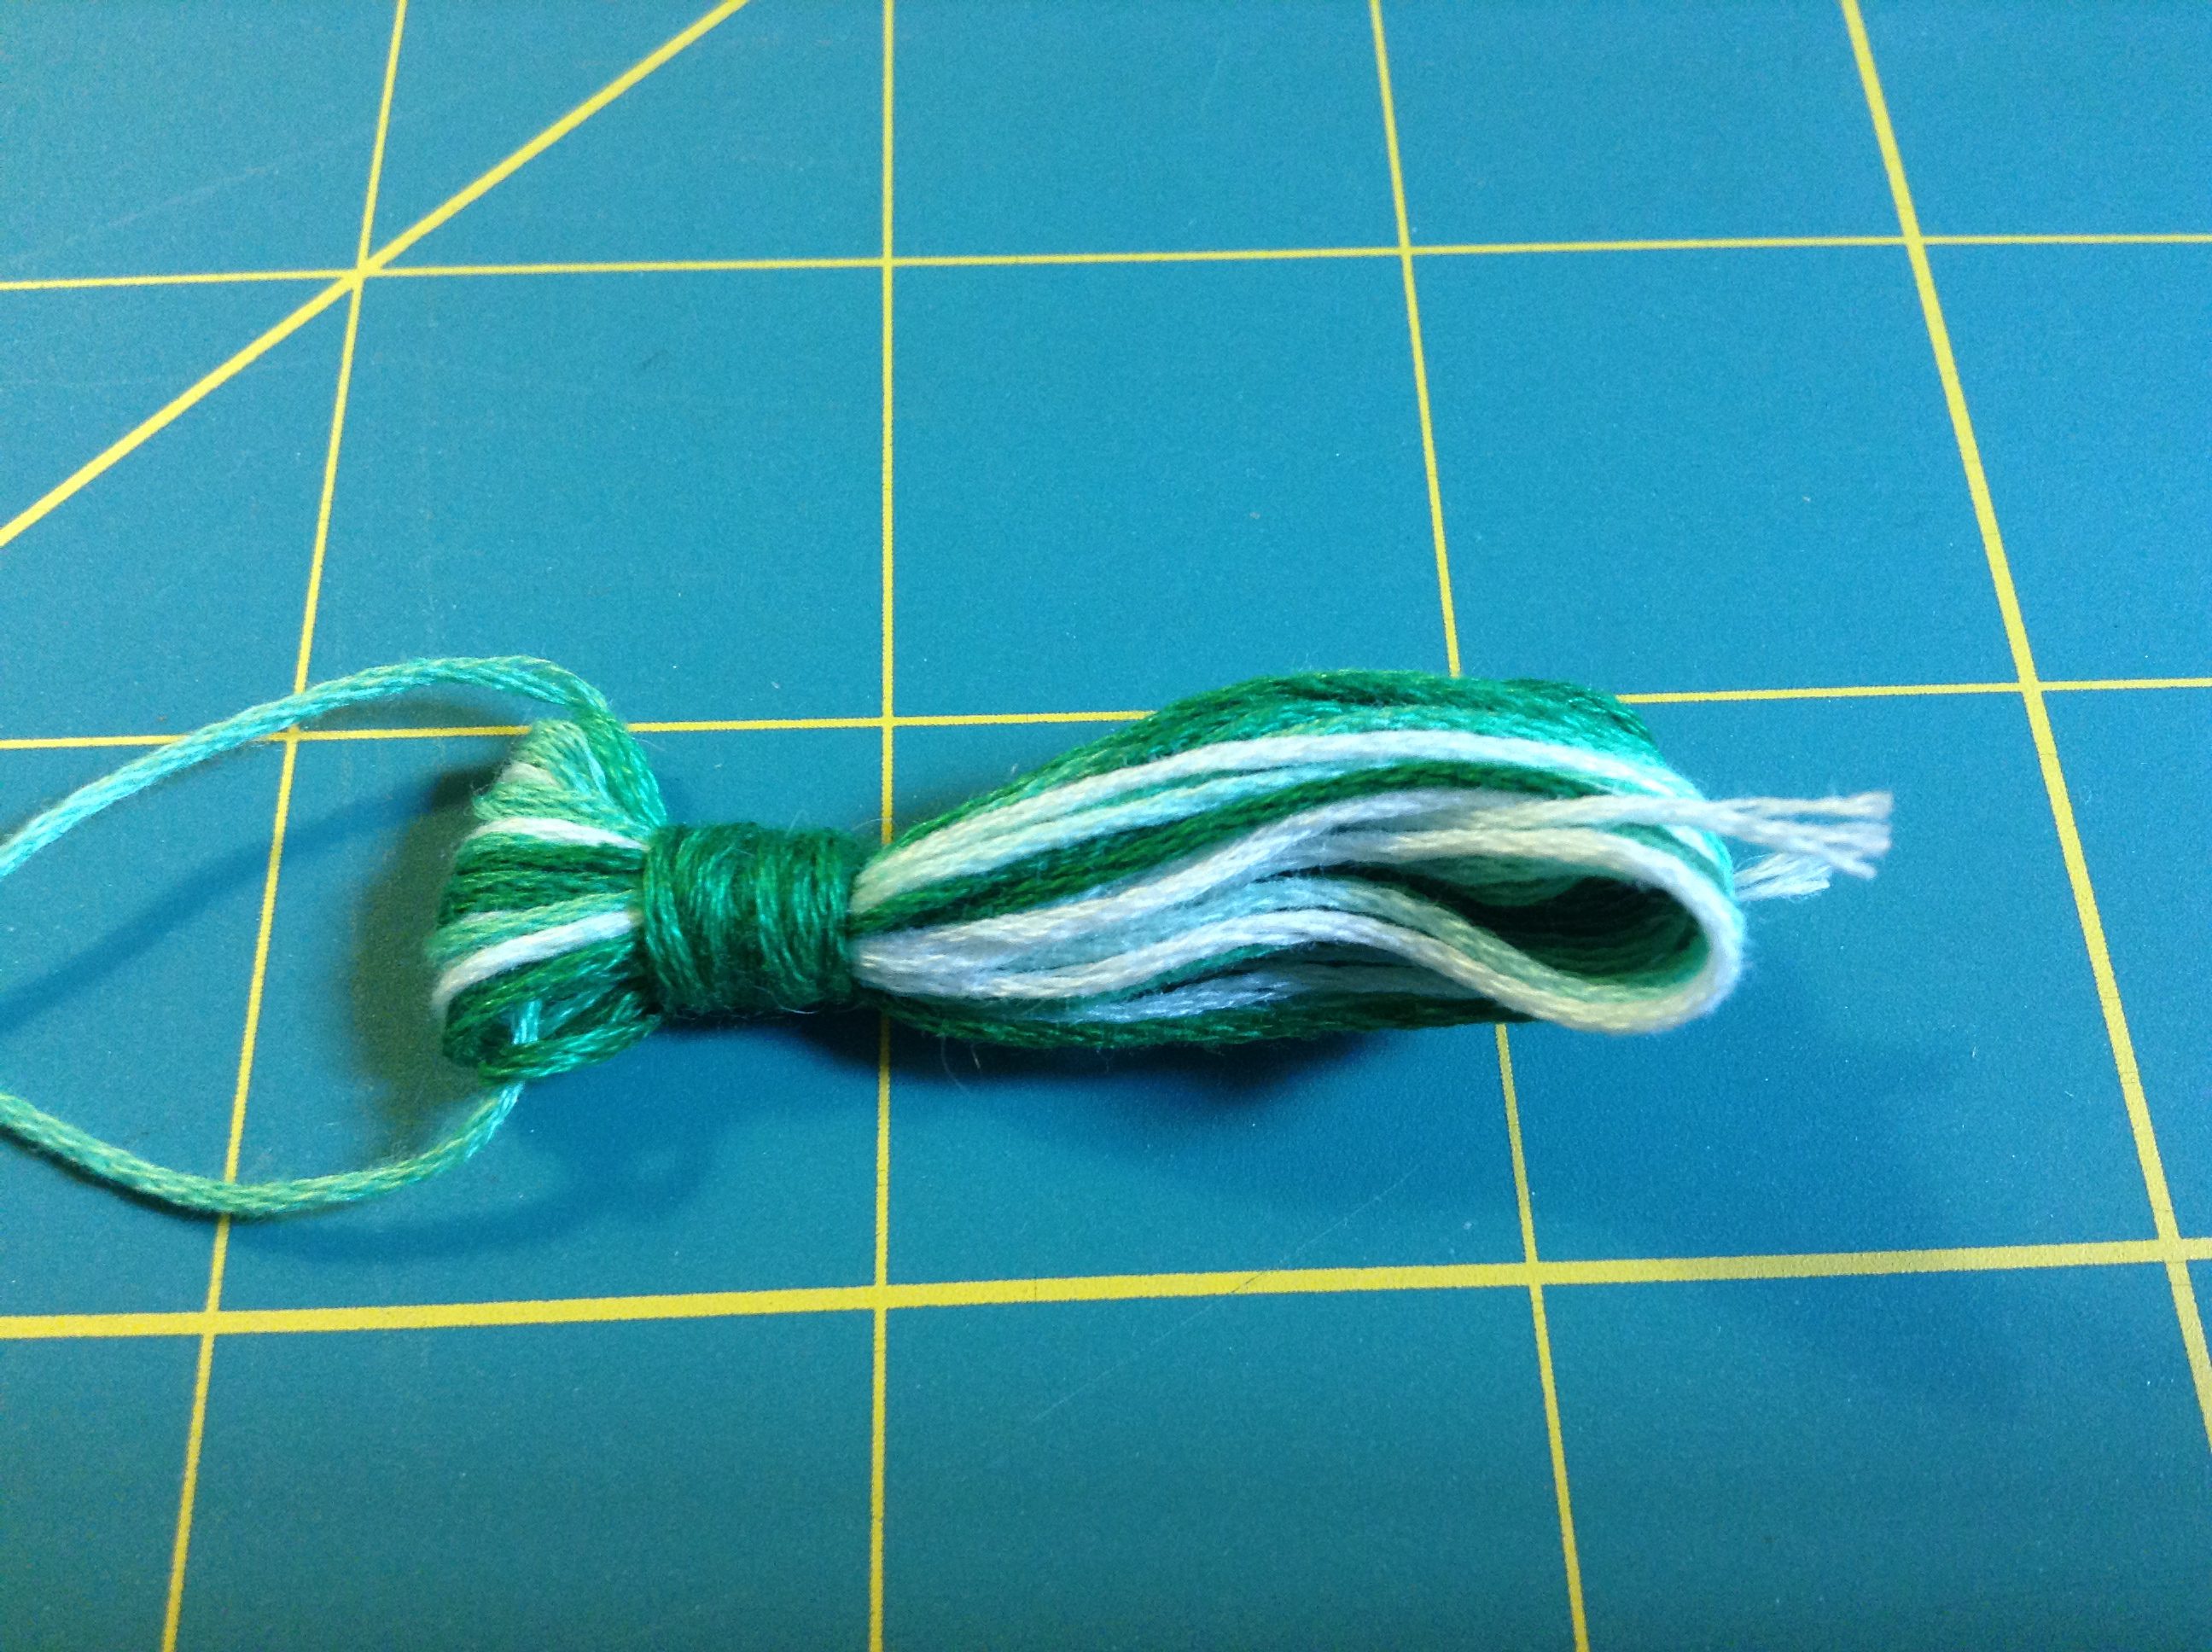
Cut the fold in your threads opposite to your coil knot.
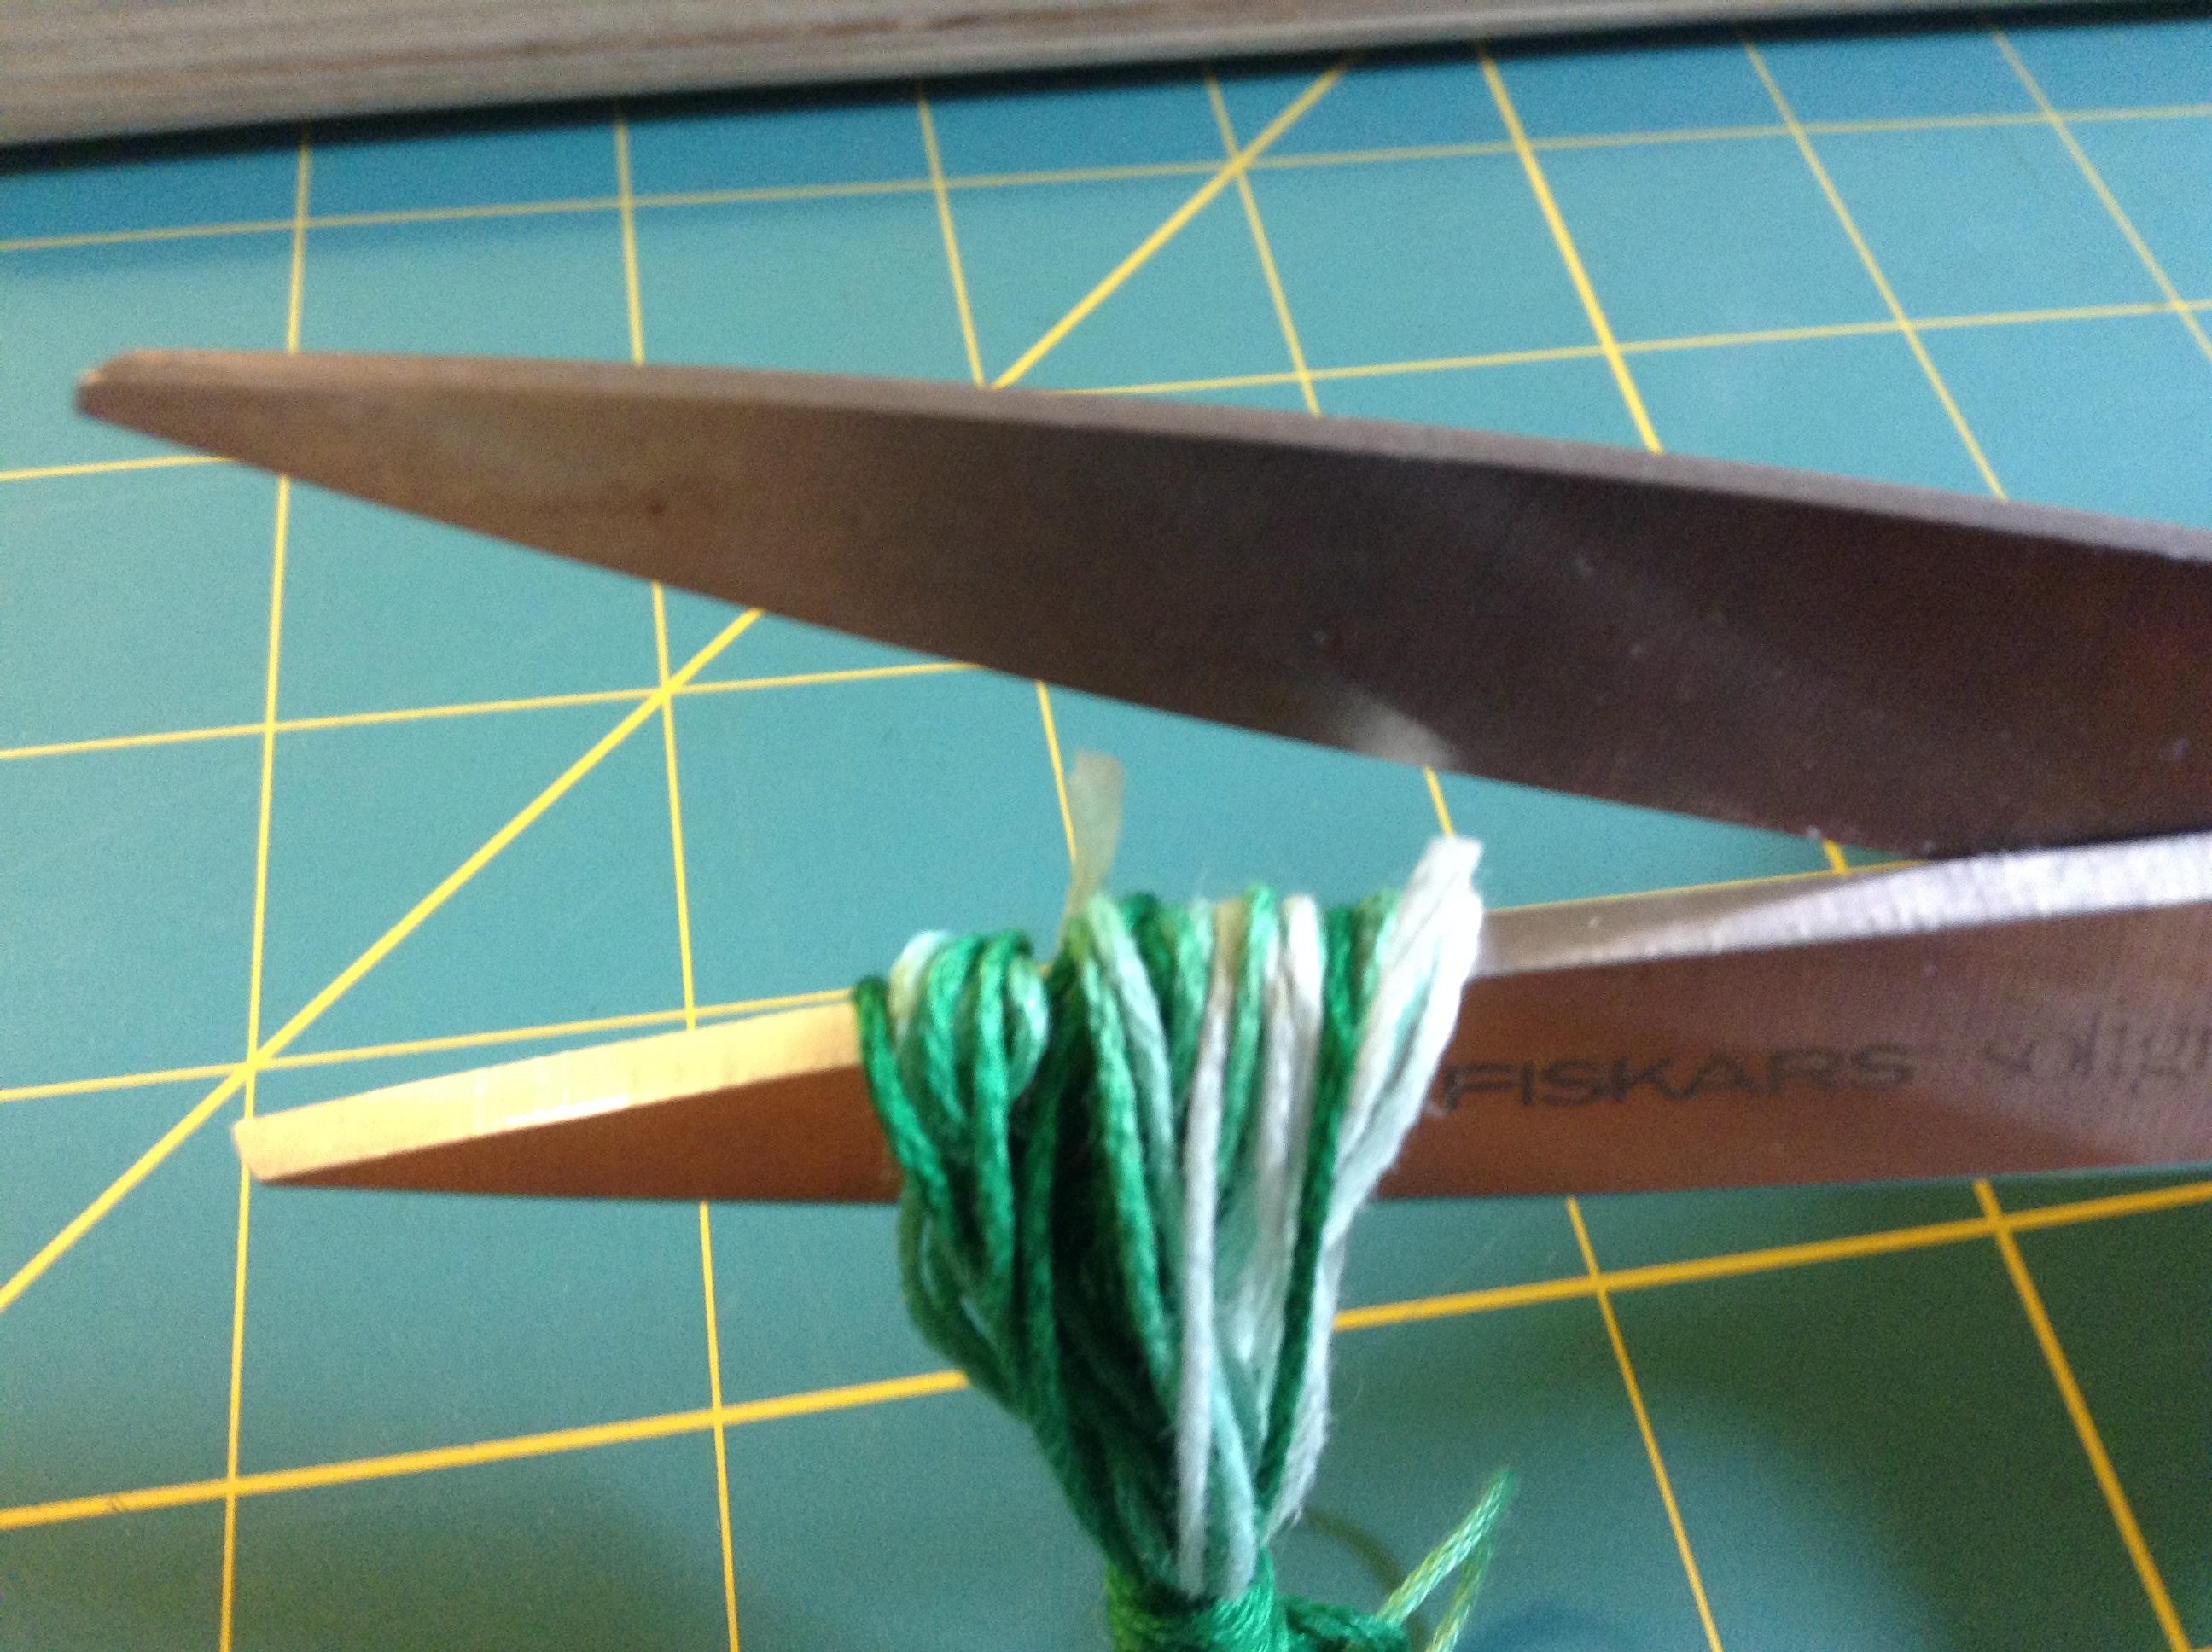
Trim any uneven edges.

And that’s how you make your own tassel. Now for the hard part, restraining yourself from putting tassels on everything in the house! 🙂
Appreciate thhe recommendation. Let me trry it out.
My blog – m88